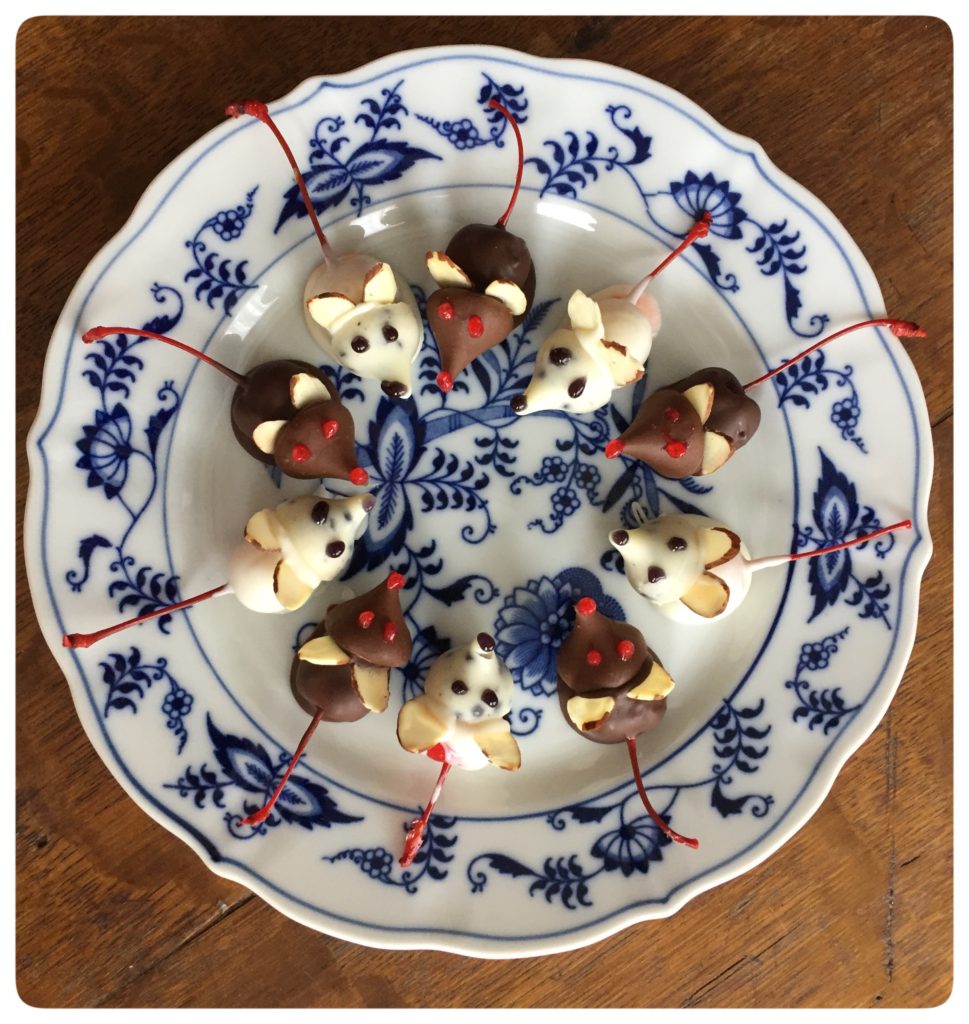

Chocolate mice are always a fun Valentine’s Day or Christmas activity. Really, making chocolate mice is fun anytime! To make these, it takes a steady hand! It’s also great fine motor practice for little hands. Be sure to read our post on cooking with the kiddos!
Below is a graphic I made of how the mice are put together. I’m showing the items I used, you may have other things around that will work or that you like better.You may want different Hershey kisses, white chocolate for melting. Play around and see what you like best.
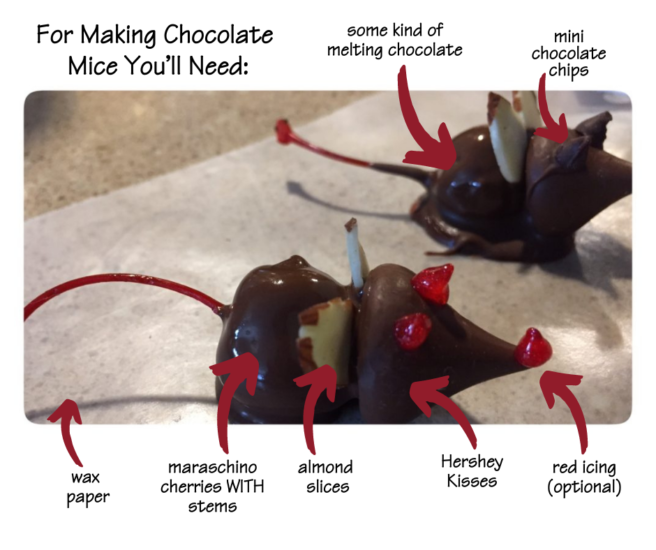
- Put your wax paper on a cookie sheet. Make sure you have a little space in the fridge for your cookie sheet. Have your almond slices (ears) ready and your Hershey kisses unwrapped and ready to use.
- Melt chocolate. You can use any kind of melting chocolate (Baker’s chocolate, candy melts). I like CandiQuik. I break some of the chocolate off and put it in a glass measuring cup because I use less chocolate that way. It’s easiest if the chocolate is deep enough to dip all of the cherry in the chocolate at once. You may need to use a spoon to help get the chocolate all over the cherry.
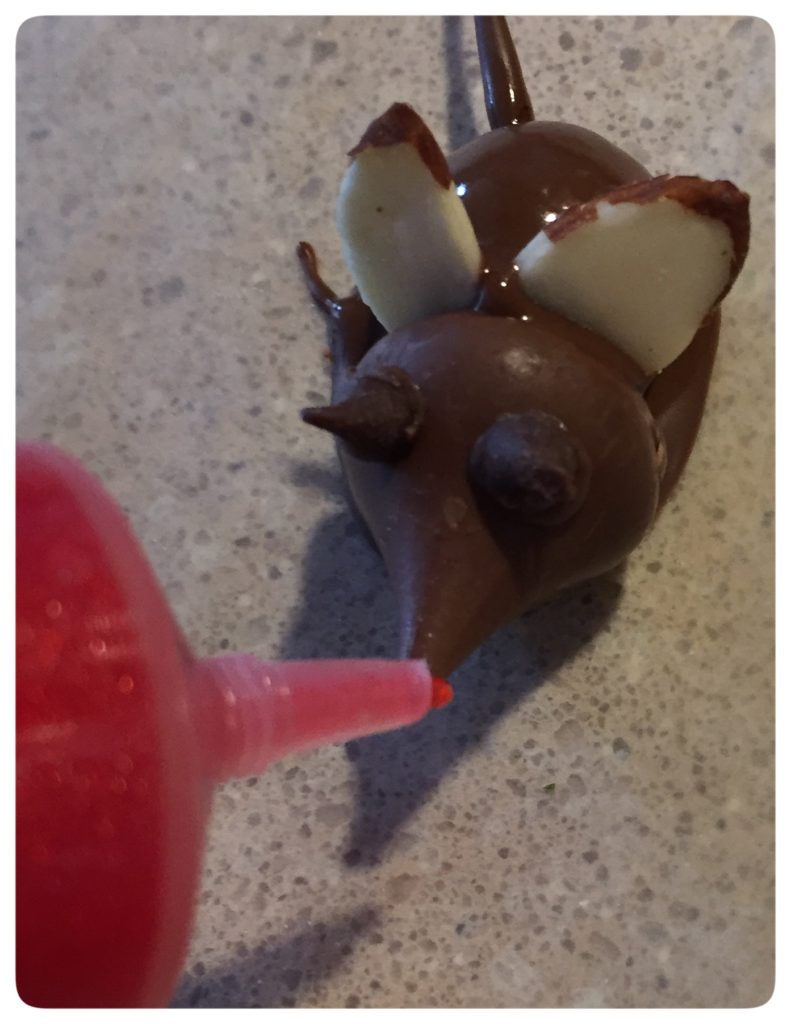
3. Lay the cherry on its side. The melting chocolate is your “glue”. Attach your Hershey kiss to the cherry. Then very gently, place your almond slices, using the melted chocolate to hold in place.
4. Now for the eyes and nose. If you are using mini chocolate chips, you need to use a little of your melted chocolate or icing to ” glue” the chips to the Hershey kiss.
5. Finish making all your mice and then refrigerate until melted chocolate has completely hardened. I store in the fridge as a single layer. The chocolate mice usually don’t last long enough to store that many!