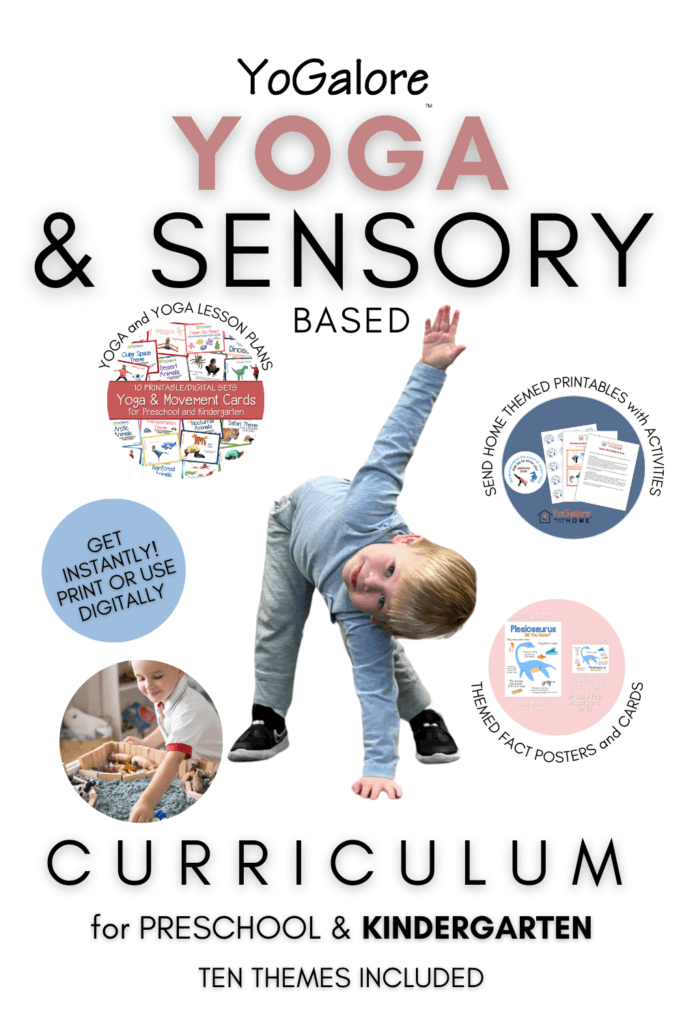
Halloween is just around the corner, and what better way to get into the spirit than by creating fun and educational Halloween activities for toddlers? If you’re a parent, preschool teacher, or caregiver, you know that keeping toddlers entertained and engaged can be a challenge. But fear not! We have the perfect solution that combines fun, learning, and a touch of spookiness—Spooky Sensory Bottles! In this blog post, we’ll explore the magic of sensory play, how to make these bottles, and why they’re one of many fantastic Halloween activities for toddlers.
The Magic of Sensory Play for Toddlers
Sensory play is an incredible way for toddlers to explore the world around them. It involves activities that stimulate a child’s senses—touch, sight, sound, smell, and sometimes even taste. These activities help in developing nerve connections in the brain, which are crucial for learning.
For instance, when a toddler shakes a sensory bottle, they not only see the glitter swirl but also hear the sound it makes and feel the weight of the bottle. This multi-sensory experience is wonderful for cognitive development. Sensory play also helps in improving fine motor skills, hand-eye coordination, and even language development.
But why Spooky Sensory Bottles for Halloween? The answer is simple. Halloween is a time filled with vibrant colors, intriguing textures, and exciting themes. Incorporating these elements into sensory play can make learning even more enchanting for toddlers.
Why Sensory Bottles?
Sensory bottles are closed containers filled with various materials that create a soothing or stimulating experience when handled. They’re easy to make, require minimal supervision, and are safe for toddlers. Plus, they offer endless possibilities for creativity and learning.
One of the significant benefits of sensory bottles is their portability. Unlike other sensory bins or tables, bottles can be easily carried around, making them perfect for on-the-go entertainment. They also provide a mess-free alternative to traditional sensory play, which can be a lifesaver for busy parents and teachers. They’re great in the car on long trips!
Another advantage is the calming effect sensory bottles can have. The gentle movement of glitter, beads, or other materials inside the bottle can be mesmerizing and soothing, helping to reduce anxiety and improve focus in toddlers. This makes them not just fun but also beneficial for emotional well-being.
Materials You’ll Need for Halloween Sensory Bottles
Before we jump into the how-to, let’s gather our materials. Here’s a list of items you’ll need to create your Spooky Sensory Bottles:
- Clear plastic bottles with lids***
- Water , clear glue
- Gel Food coloring
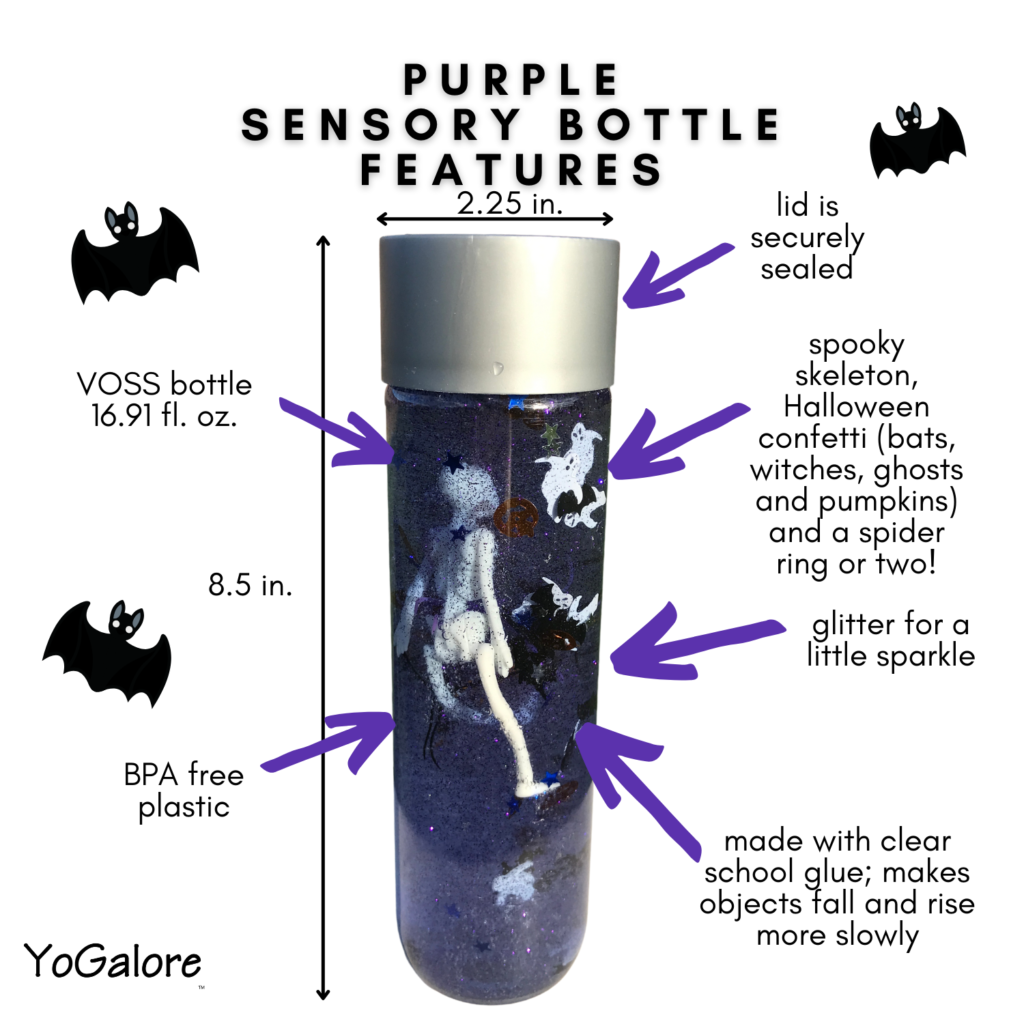
- Halloween confetti
- Small Halloween-themed trinkets (squishy pumpkins, spiders, squishy skeletons, bats, etc.)
- Halloween erasers
- Hot glue gun (for sealing the lids)
These materials are readily available and can be found at any craft store or online. The best part? You can customize your sensory bottles based on what you have on hand, making each bottle unique and special.
Choosing Bottles for Halloween Activities
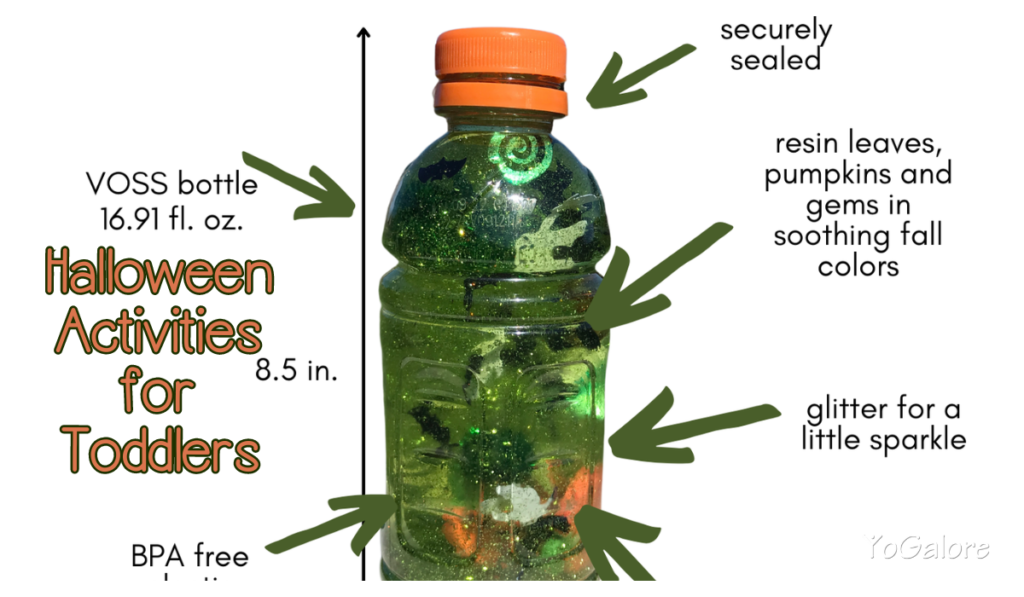
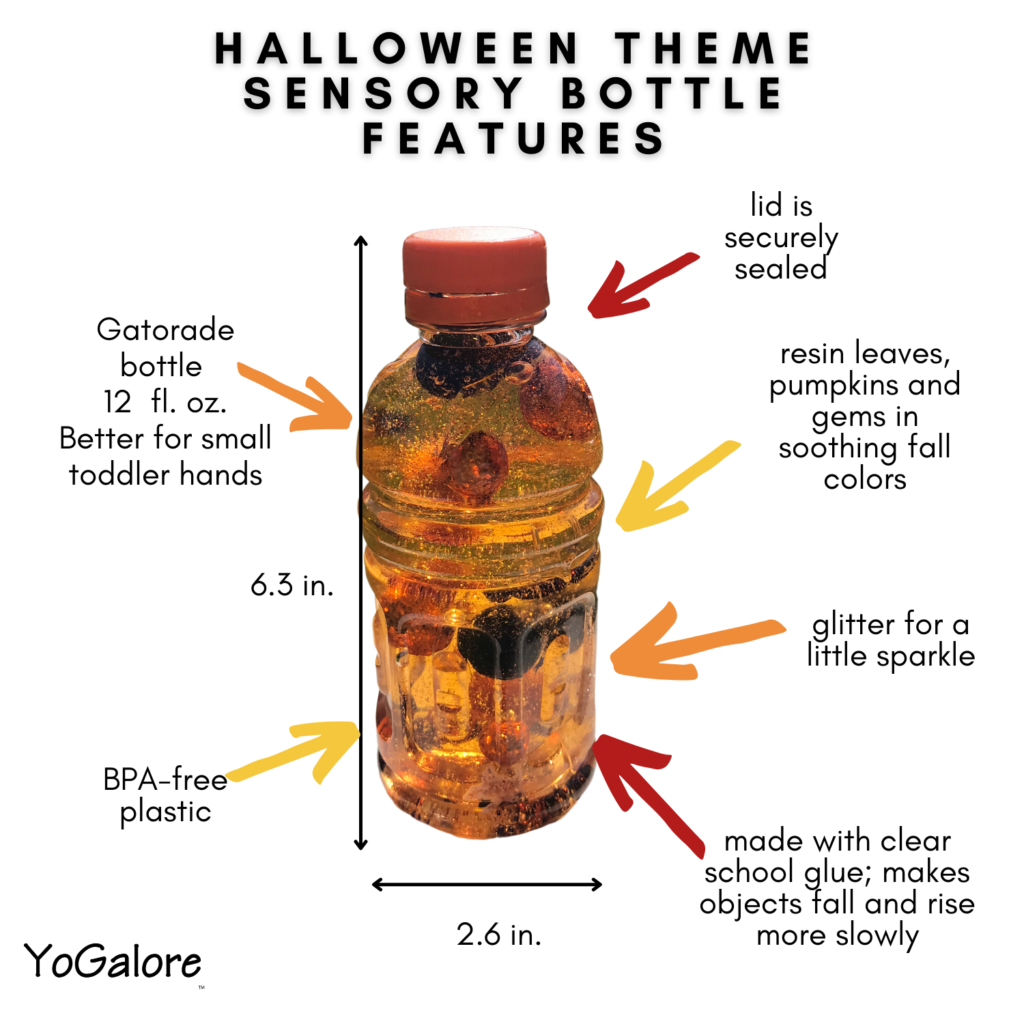
The first step in creating your sensory bottles is selecting the right containers. Clear plastic bottles are ideal because they’re durable and won’t shatter if dropped. Make sure the bottles are clean and dry before you start filling them.
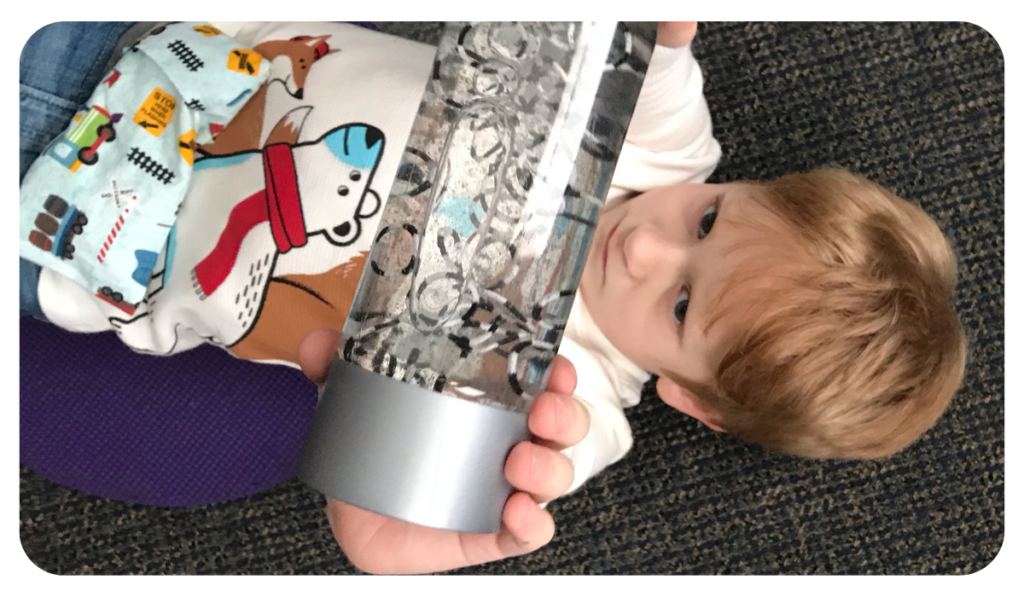
When it comes to size, smaller bottles are easier for toddlers to handle. However, larger bottles can hold more materials and provide a more extended sensory experience. A good starting point is to have a variety of sizes and shapes to see which ones your toddler prefers. For my toddler classes, I prefer the smallest Gatorade bottles. Little hands can hold onto the smaller bottles with grooves a bit better and they’re a little lighter as well. If they’re dropped, they seem to withstand the fall better than smooth, taller bottles.
Don’t forget to test the lids! Ensure they fit securely and can be sealed with hot glue to prevent any accidental spills. Safety is paramount, so double-check that everything is toddler-proof before moving on to the next step.
Starting Your Halloween Sensory Bottles
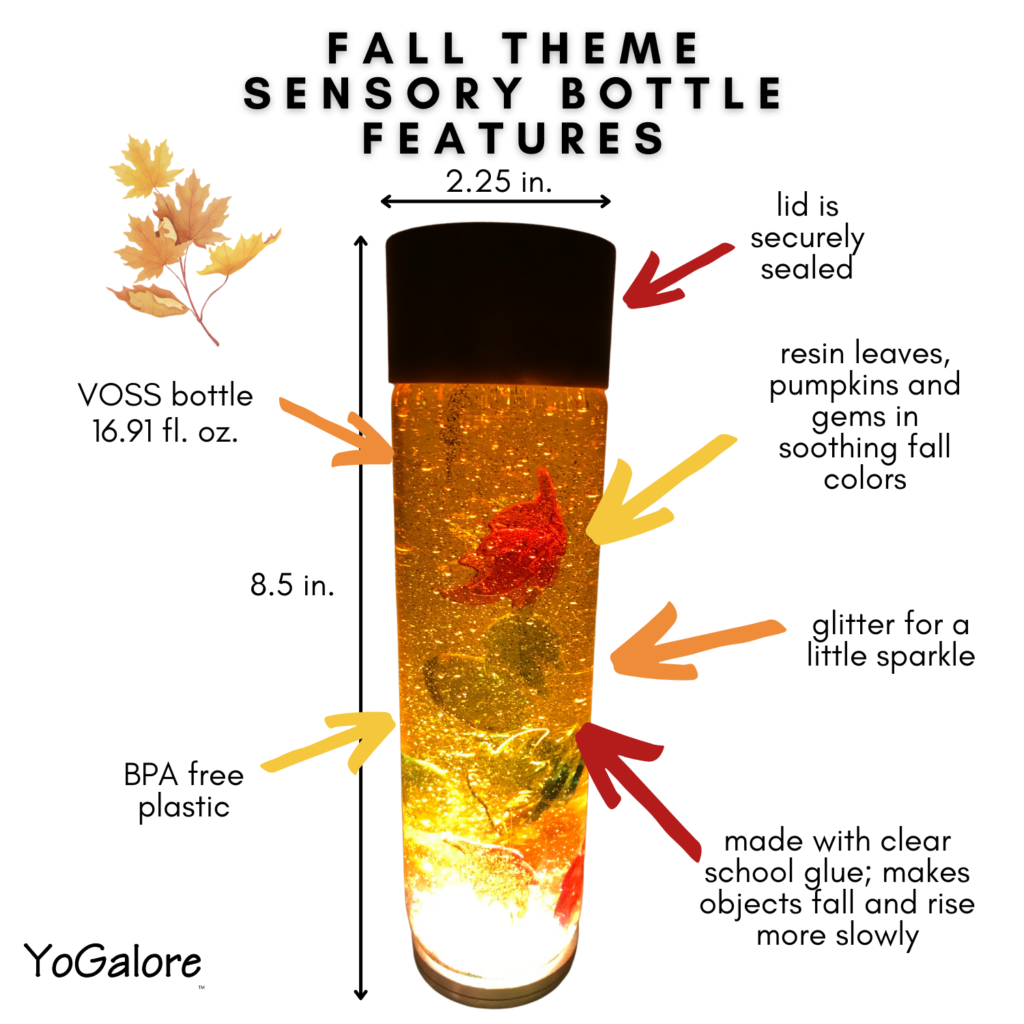
Next, you’ll need to fill your bottles with a liquid base. You can use water, clear glue, or a combination of both. Clear glue will create a slower-moving effect, while water will make the contents move more freely. I like mine to have the stuff move slowly, so I use about 2/3 glue, 1/3 water. I have also used clear hair gel and even clear liquid soap because I had a ton of it at the time, but no clear glue.
Start by filling the bottle halfway with your chosen liquid. This gives you enough room to add the other materials without overflowing.
Adding the Fun Stuff to Sensory Bottles
To make your sensory bottles truly spooky, incorporate Halloween-themed trinkets. Look for miniature pumpkins, plastic spiders, bats, and other small items that fit the Halloween theme. These trinkets can be found at craft stores or online.
Gently place the trinkets into the bottle, ensuring they can move freely within the liquid. The goal is to create a dynamic sensory experience where the trinkets float and interact with the glitter and other materials. I like to use things with different buoyancy. Some things will float, while others sink, which I think makes it more interesting to look at.
If you’re using water, you can add a few drops of food coloring to the water before adding it to your bottle. Orange, green and purple are perfect colors for Halloween-themed bottles.
Once you’ve added the liquid base, trinkets and water, put the lid on and give the bottle a gentle shake to mix everything. This is also an excellent opportunity to test the seal and make sure there are no leaks.
Toddlers will love discovering the hidden items as they shake and turn the bottles. It’s like a mini treasure hunt, adding an element of surprise and excitement to the activity.
Once you’ve added all your materials, it’s time to seal the bottles. This step is crucial to ensure that the contents stay inside and the bottles are safe for toddlers to handle.
Use a hot glue gun to secure the lids tightly. Apply a generous amount of glue around the rim of the bottle before screwing on the lid. Once the lid is in place, add an extra layer of glue around the edges for added security. Allow the glue to dry completely before giving the bottles to toddlers. Test each bottle to make sure there are no leaks or loose parts. Safety should always be your top priority.
How to Engage With Toddlers Using Halloween Sensory Bottles
Now that your Spooky Sensory Bottles are ready, it’s time for your toddlers to explore! Sit with them and encourage them to shake, roll, and turn the bottles to see how the contents move.
Ask open-ended questions to engage their curiosity. For example, “What do you see inside the bottle?” or “Can you find the spider?” This not only enhances their sensory experience but also promotes language development and critical thinking skills.
Observe how your toddlers interact with the bottles. Each child will have a unique way of exploring, and that’s perfectly okay. The goal is to provide a fun and educational activity that stimulates their senses and fosters creativity.
Educational Benefits for Toddlers
Spooky Sensory Bottles offer a range of educational benefits for toddlers. They promote sensory exploration, which is essential for brain development. The different textures, colors, and sounds stimulate neural pathways and enhance cognitive skills.
Fine motor skills are also developed as toddlers manipulate the bottles. Shaking, turning, and rolling the bottles require hand-eye coordination and dexterity, which are crucial for tasks like writing and buttoning clothes.
Additionally, sensory play fosters social and emotional development. It encourages toddlers to express their feelings, share their discoveries with others, and build confidence in their abilities. It’s a holistic approach to learning that supports all aspects of development.
Sensory Bottle Tips
To ensure a successful sensory play experience, keep these tips in mind:
- Supervision: Always supervise toddlers during sensory play to ensure safety.
- Variety: Create a variety of sensory bottles with different materials and themes to keep the activity fresh and exciting.
- Clean-Up: Have a designated area for sensory play to make clean-up easier. I often make my sensory bottles over a dish pan which keeps any spillage in the container.
- Encouragement: Encourage toddlers to explore and ask questions. Celebrate their discoveries and achievements to boost their confidence.
By following these tips, you can create a positive and enriching sensory play experience for your toddlers.
Halloween Activities for Toddlers
If you’re a preschool teacher or caregiver, consider setting up a sensory bottle station in your classroom or daycare. This dedicated space allows toddlers to explore sensory bottles at their own pace and revisit the activity whenever they like.
Provide a variety of bottles with different themes and materials. Rotate the bottles regularly to keep the station interesting and engaging. You can also include related books, toys, and props to extend the sensory experience.
Having a sensory bottle station not only enriches your curriculum but also provides a calming and therapeutic activity for toddlers. It’s a wonderful addition to any early childhood education setting.
Additional Ideas for Halloween Activities
For an even more engaging experience, involve toddlers in the creation process of the sensory bottles. Allow them to choose the materials, colors, and trinkets they want to include. This hands-on approach fosters creativity and gives them a sense of ownership.
Set up a safe and supervised crafting area where toddlers can explore the materials and help assemble the bottles. Provide guidance and assistance as needed, but encourage them to make their own choices and decisions.
Involving toddlers in the creation process not only enhances their sensory experience but also promotes independence and problem-solving skills. It’s a fantastic way to turn a simple activity into a meaningful learning opportunity.
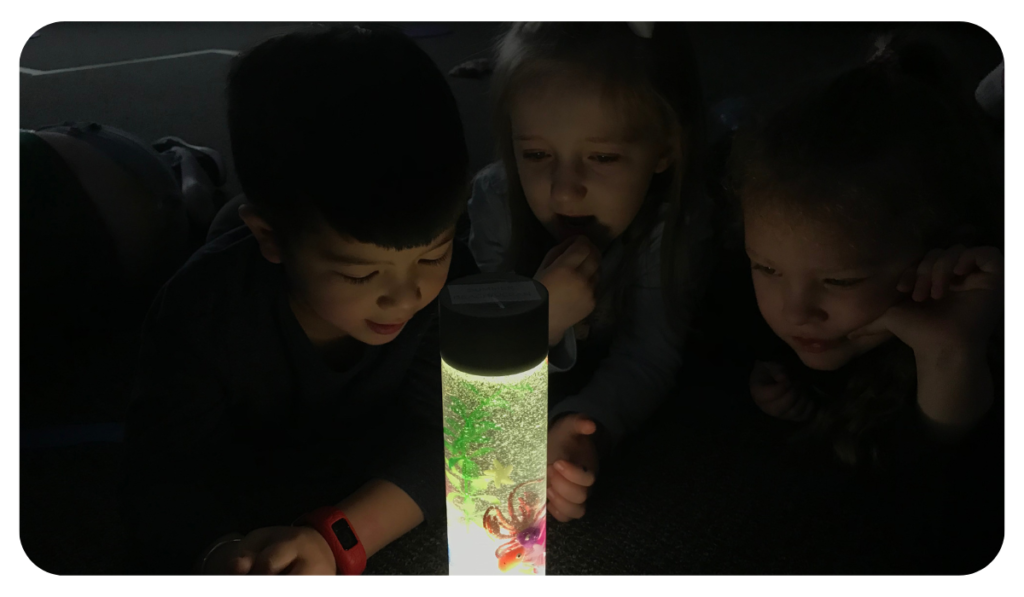
If you have a flat puck light or light strip, place the sensory bottles on the lights at night. SO COOL!!!!
Once your sensory bottles are complete, share the fun with friends and family! Organize a Halloween-themed playdate or party where toddlers can showcase their creations and explore them together.
You can also share photos and videos of your sensory bottles on social media to inspire other parents and caregivers. Use hashtags like #SpookySensoryBottles and #HalloweenSensoryPlay to connect with a community of like-minded individuals.
Sharing the fun not only spreads the joy of sensory play but also fosters a sense of community and collaboration. It’s a wonderful way to celebrate the spirit of Halloween and create lasting memories.
Spooky Sensory Bottles are a fantastic Halloween activity for toddlers that combines fun, learning, and creativity. They provide a multi-sensory experience that stimulates cognitive, motor, and emotional development.
By following the steps outlined in this blog post, you can create your own magical sensory bottles and provide a captivating and educational activity for your little ones. Whether you’re a parent, preschool teacher, or caregiver, these bottles are sure to be a hit.
Ready to get started? Gather your materials, set up a crafting station, and let the creativity flow. Your toddlers will thank you for the enchanting experience, and you’ll enjoy seeing the joy and excitement on their faces.
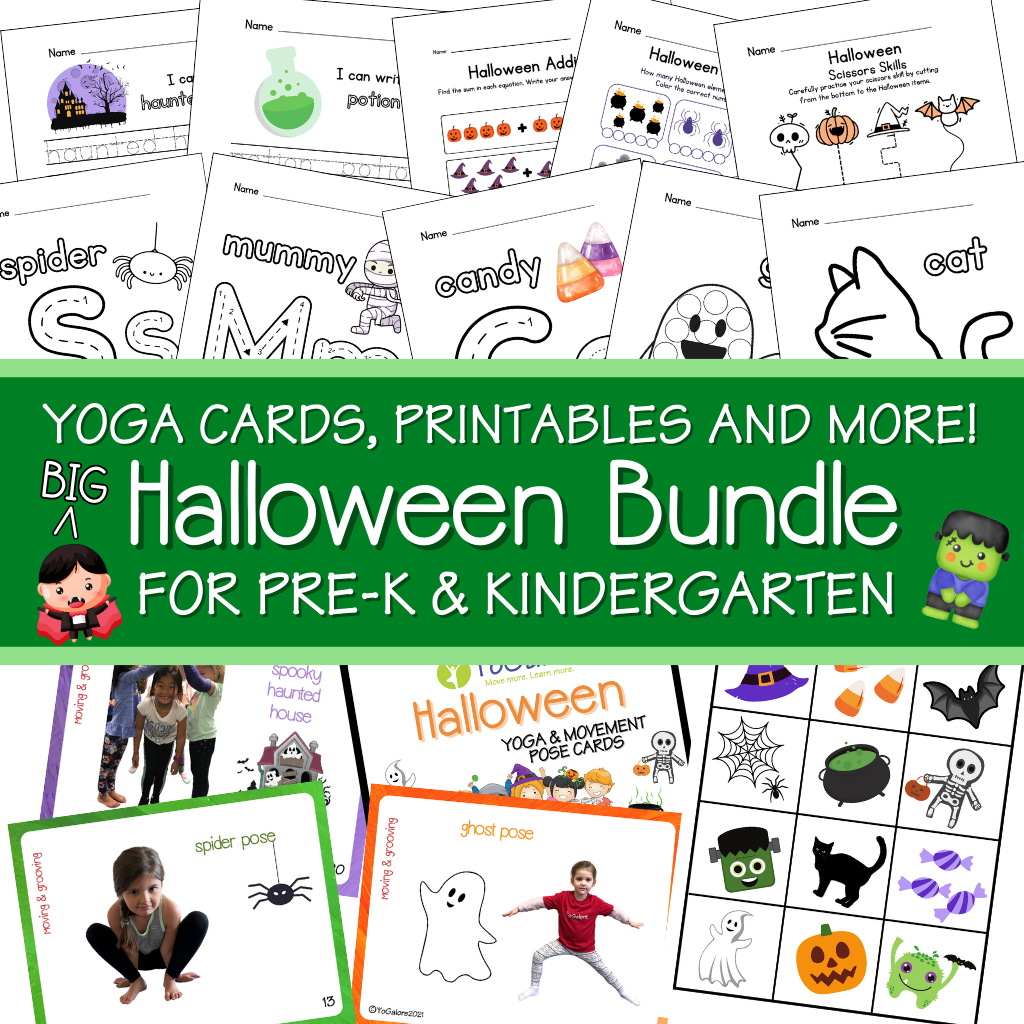
And if you’re looking for other Halloween theme activities, try our Halloween Activity Bundle! It’s full of printables for dot markers or light tables, Halloween coloring pages, games and yoga pose cards!!!!
Happy Halloween and happy crafting!
**This post contains affiliate links. If you click on the product link and make a purchase, I receive a small commission at no cost to you. Thank you!!!